This week I have been working on mixing our track, a cover of Fleetwood Mac’s ‘Don’t Stop’. Below is a log of everything I did when mixing the track.
Drums
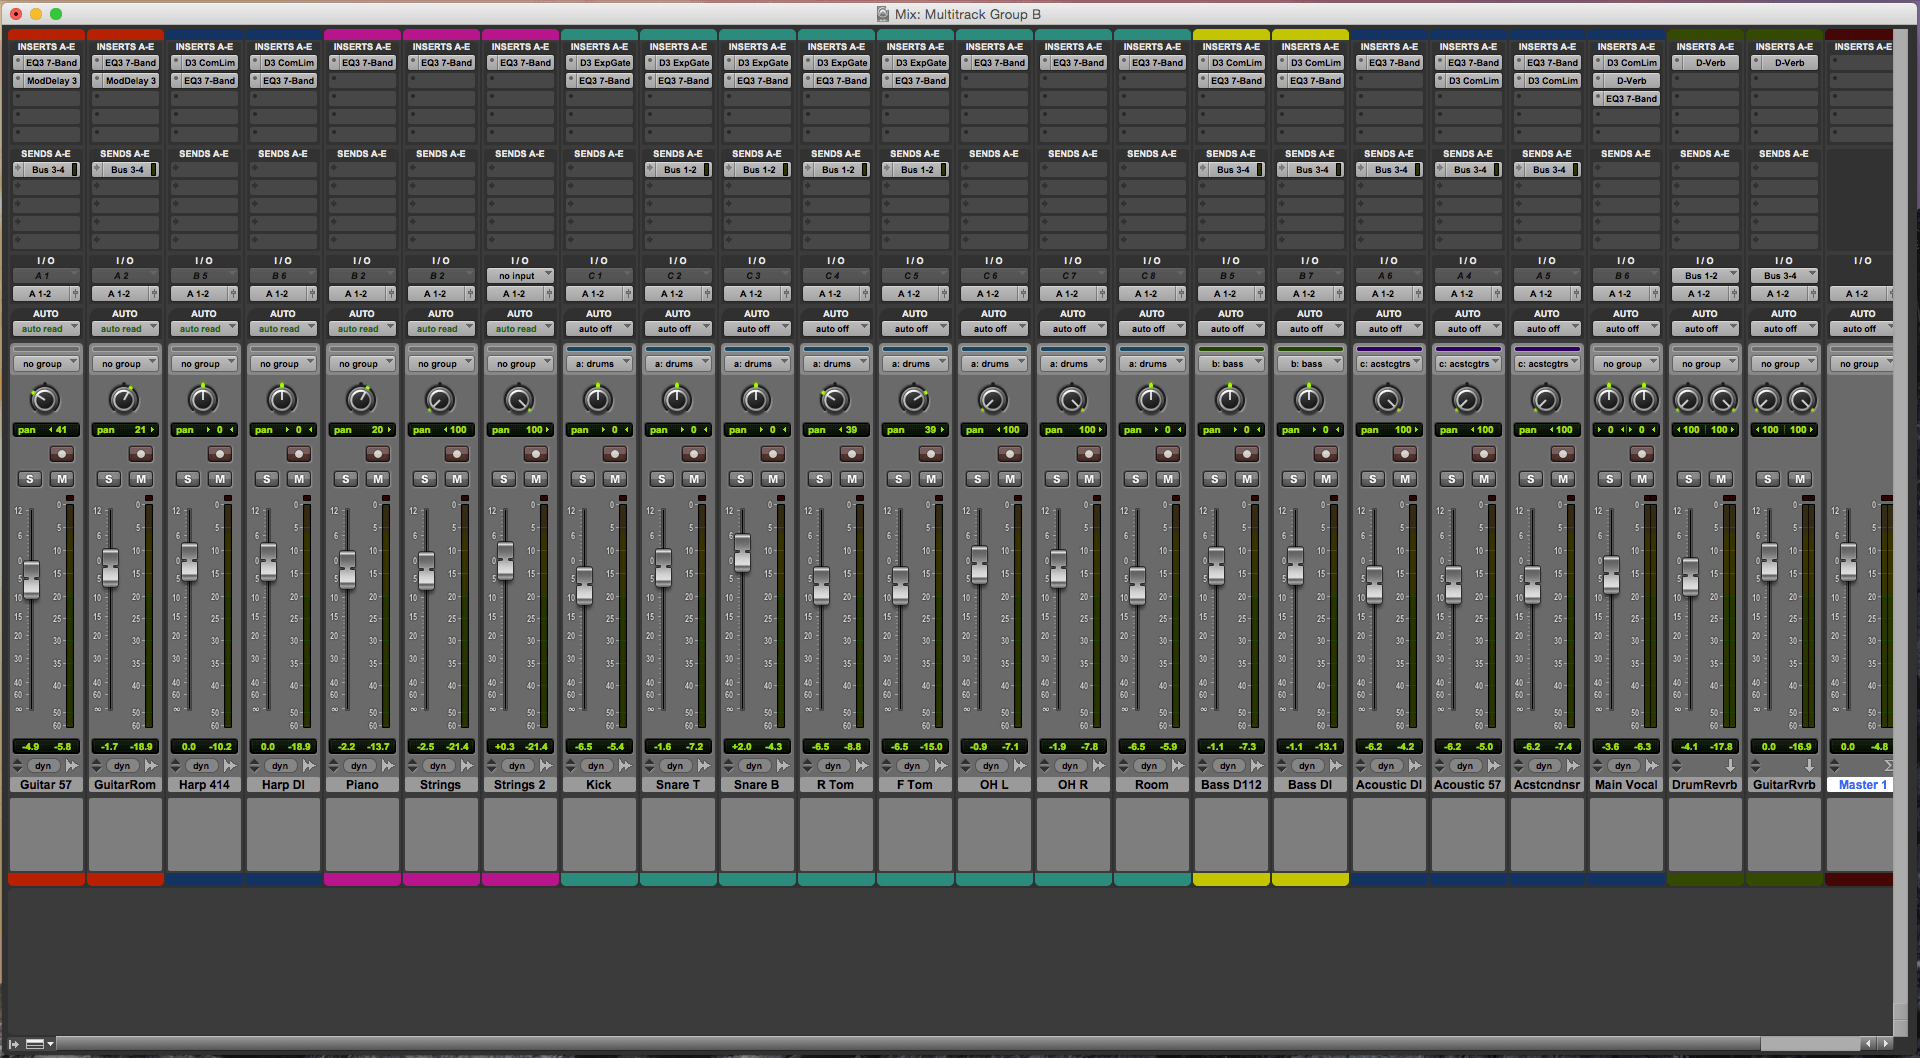
Kick – Gate used to removed the spill from the snare drum and cymbals. 7-Band EQ: 4dB Boost 100Hz and below to boost the low end with a 3dB cut around 400Hz to reduce the boxiness.
Snare Top – Gate used to remove the spill from hi hat and cymbals. 7-Band EQ: 3dB cut around 400Hz to reduce the boxiness and removing a ‘boing’ sound around 500Hz.
Snare Bottom – Gate used for the snare top copied onto snare bottom. 7-Band EQ: 3dB cut around 400Hz to reduce the boxiness and a 3dB cut around 3kHz to remove some of the higher snare rattle.
Rack Tom – Gate used to remove the spill from the cymbals. 7-Band EQ: High Pass filter at 100 Hz, 3dB cut around 400Hz to reduce the boxiness and a boost around 3kHz to accentuate the voicing of the tom.
Floor Tom – Gate used for the rack tom copied onto floor tom. 7-Band EQ parameters used for the rack tom copied onto floor tom.
Overhead Left – 7-Band EQ: High pass filter at 100 Hz to remove any low end spill from the kit, 3dB cut around 400Hz and a 3dB boost to 10KHz and above to accentuate the cymbals.
Overhead Right – 7-Band EQ parameters used for the overhead left copied onto overhead right.
Room Mic – 7-Band EQ parameters used for the overheads copied onto room mic.
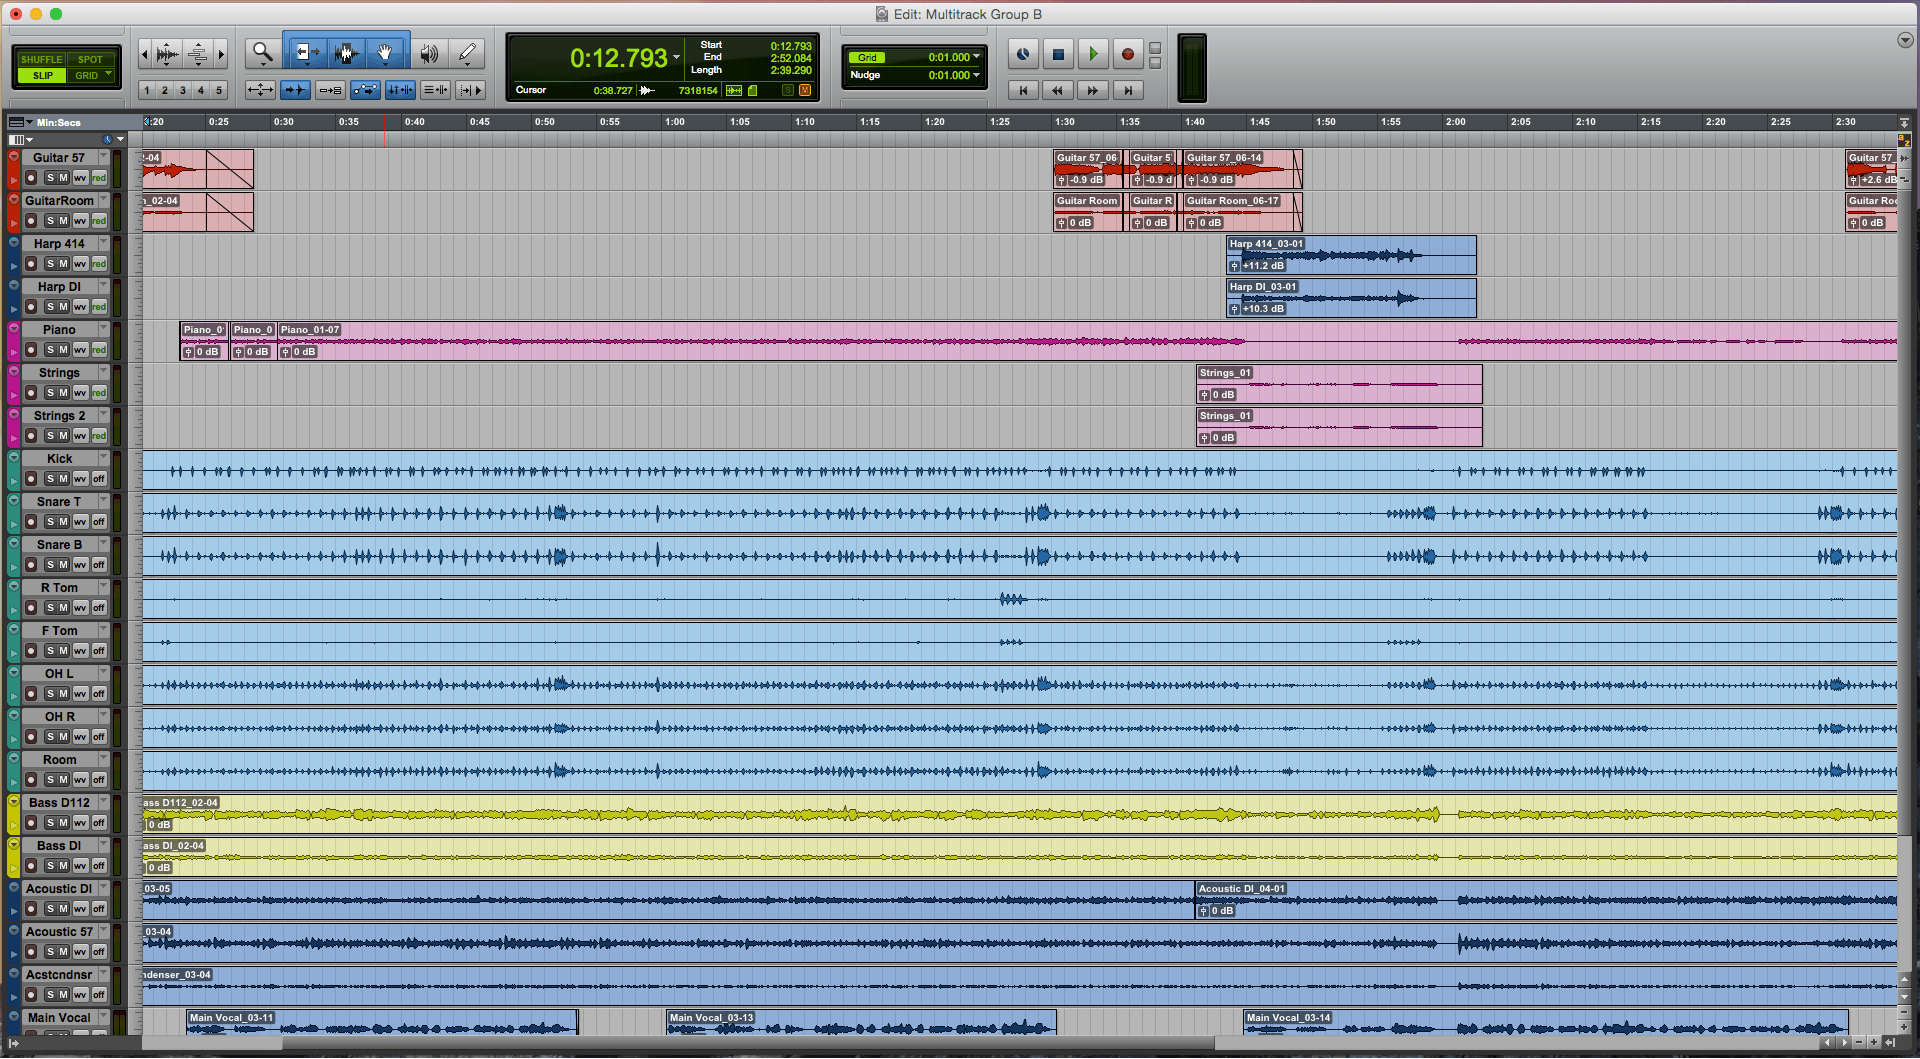
Panning – Kick drum and snare in the centre, overheads panned hard left and right, rack tom 1/3 left floor tom 1/3 right room mic in the centre used to bring the kit sounds together.
Reverb Aux Track – Reverb auxiliary track created for the drums (Snare top and bottom, rack and floor tom). Medium Plate reverb with 1.2 second decay.
Guitars
Bass Guitar – Compression used to reduce the dynamic range of the bass sound, remove some of unwanted line sounds. 7-Band EQ: 4dB boost to 100Hz and below to boost the low end, 3dB cut around 400Hz, remove ringing frequency around 3KHz and a 3dB boost 8KHz and above to add clarity to notes.
Bass Guitar DI – Compression used to reduce the dynamic range of the bass sound. 7-Band EQ parameters used for bass guitar copied onto bass guitar DI but with no boost at 8KHz and above.
Acoustic Guitar 1 DI – 7-Band EQ: 4dB boost 250Hz and below to add more low end with a 3dB cut around 400Hz to add clarity to the sound.
Acoustic Guitar 2 – Compression used to reduce the dynamic range of the acoustic guitar sound, remove some unwanted noise. 7-Band EQ parameters used for acoustic guitar 1 copied onto acoustic guitar 2.
Acoustic Guitar 2 Room Mic – Compression used to reduce the dynamic range of the acoustic guitar sound, remove some unwanted noise. 7-Band EQ parameters used for acoustic guitar 1 copied onto acoustic guitar 2.
Lead Guitar – 7-Band EQ: High Pass filter at 250Hz to remove some of the lower end. Slap-back Delay added with 500ms delay to create an interesting sound within the mix.
Lead Guitar Room Mic – 7-Band EQ parameters used for lead guitar copied onto lead guitar room mic. Slap-back Delay settings used for lead guitar copied onto lead guitar room mic.
Panning – Bass guitar in the centre, guitar 1 hard right, guitar 2 hard left, 2 lead guitar signals 1/4 left and 1/4 right.
Reverb Aux Track – Reverb auxiliary track created for the guitars. Medium Ambient reverb with 650ms decay.
Other Instruments
Piano – Corrected mistakes by creating a 2 bar looped section and inserted where needed. 7-Band EQ: High Pass filter at 250Hz to remove low end. 3db cut around 400Hz. 4dB boost at 5.5KHz to increase clarity in the mix.
Synth strings – Duplicated Mono track and panned each one left and right creating a wider stereo feel. 7-Band EQ: 6dB boost at 4.25KHz and above to increase clarity and make it sit well in the mix.
Harp – Compression used to reduce the dynamic range of the harp. 7-Band EQ: High pass filter at 200Hz to reduce the low end resonance and a 3dB cut around 350Hz.
Vocals
Lead Vocals – Compression used to reduce the dynamic range of the vocals, for this I used one of the compressor presets in ProTools – ‘Vocal Leveller’. This reduced the loud parts of the vocal track and boosted the softer parts, to compensate for the gain reduction I used the make up gain to bring the track up to a desired level. 7-Band EQ: High Pass filter at 250Hz, 3dB cut around 300Hz and a 3dB boost at 3KHz to increase the clarity of the female vocals. Reverb added as an insert – for this I used a small plate reverb with a 200ms decay.
Final Corrections
– Listen back to the track to make sure I was happy with each instrument sound.
– Adjust instrument levels to create a balanced mix.
– Use automation to adjust the levels of instruments when the lead guitar is playing and during the instrumental parts.
– Tidy up the track (Cut down the long sustained ending and added small fade in/outs to parts so there arrival in the mix isn’t abrupt)
– Exported the track as a .MP3 file.
– Compared the track with a second track. For this I used Nina Nesbit’s cover of the same song ‘Don’t Stop’, this was not to make that track sound the same as hers but to compare the mix as we were using a similar instrument arrangement as her version.
– Listen to the track through different speakers (Desktop monitors, small speakers and headphones) listening to it quietly, loud and at normal listing volume.